Showing posts with label Recipes. Show all posts

Thursday, October 24, 2013

Paleo Bacon Chili


I had a fun day today.  A friend of mine is in cosmetology school and she had a makeup competition today and needed a model.  The students were allowed to pick their own themes and my friend decided to make me into a Viking Opera Singer.


We had a blast all morning.  She did a great job and when it came time to announce the winners, my friend placed second with the makeup she did.  I think we had a real shot at first, but look at the top three in the next picture.


Isn't that little girl just the cutest thing ever?!  How could we possibly beat her?  Third place was very well done (even if this isn't the best picture.)  The fun part was the whole outfit I'm wearing is actually mine, except for the wig.  I'm so glad I was able to go help my friend out and take a little detour out of my normal routine.  Thankfully, my hubby was home to do school with the kids.  In good news, he got a job but doesn't start working until Nov 4th, so we've got a little time home with him.  In fact, he's taking #2 hunting tomorrow morning for the youth season.  Good times for them!


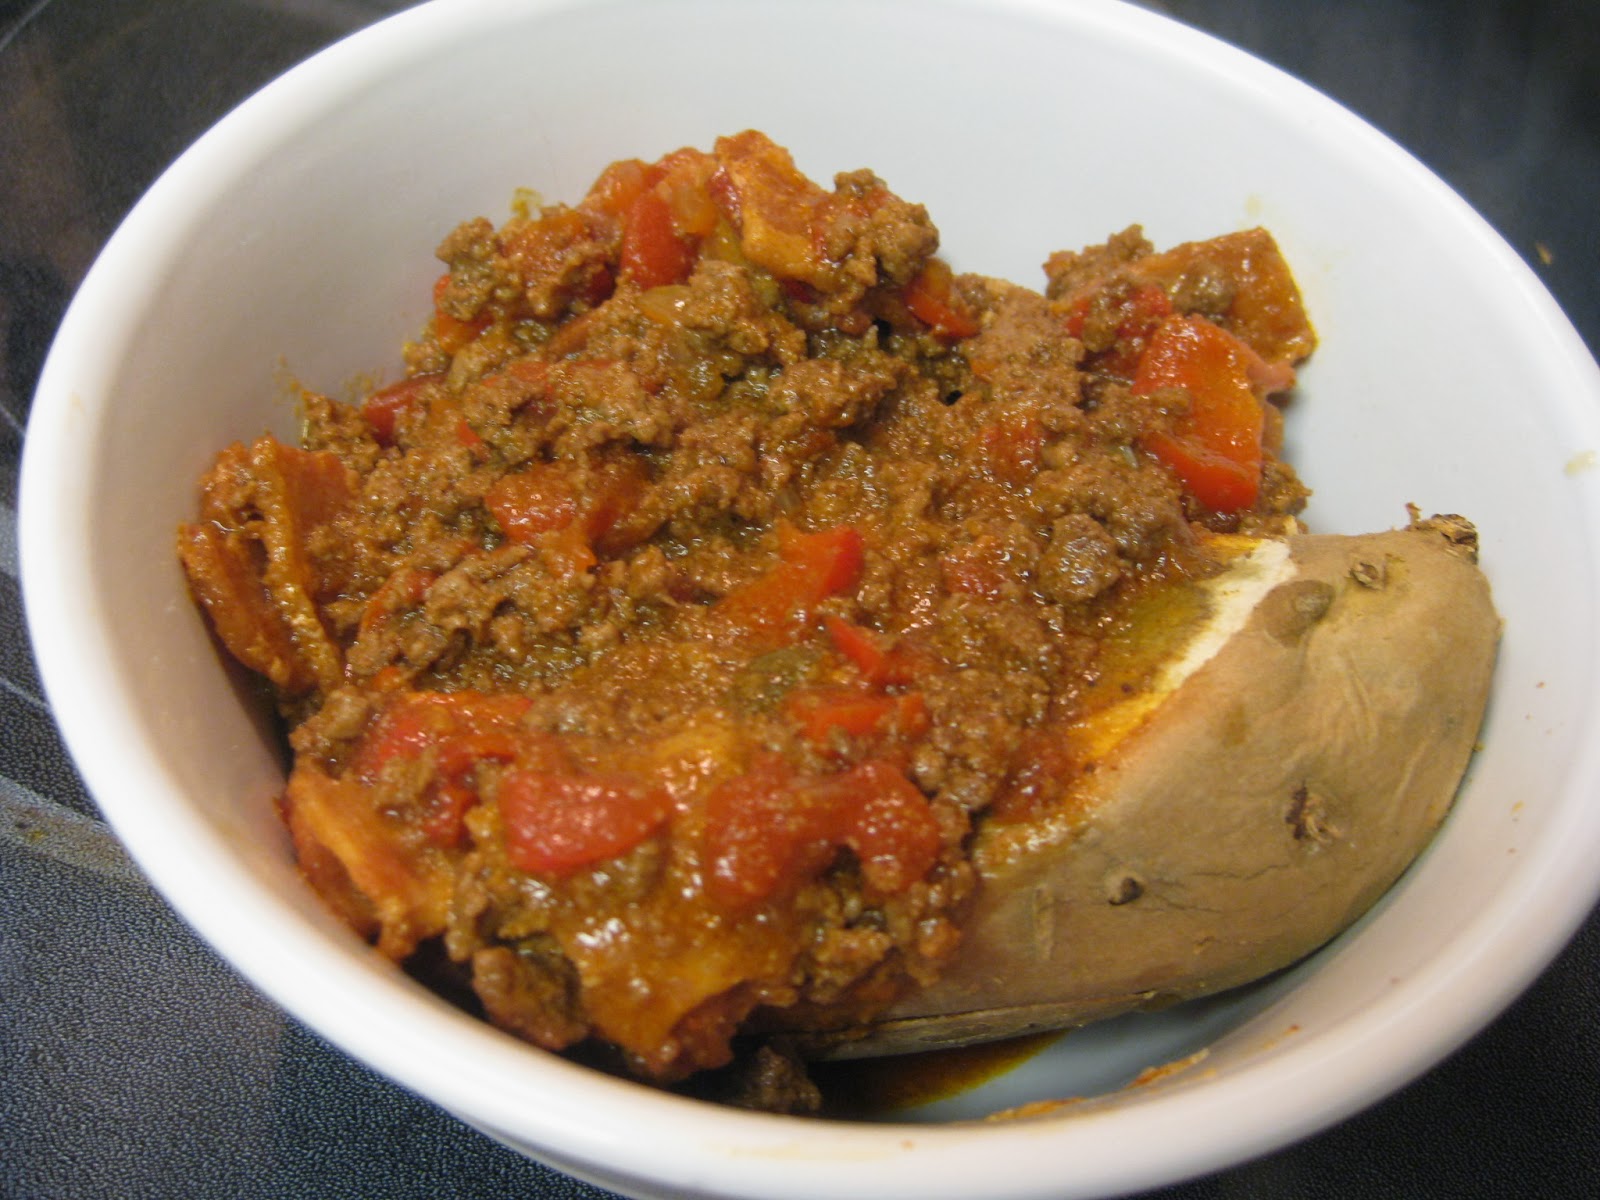
Tonight's meal was an easy one.  I started by taking 2 yams and slicing them in half and sticking them in a 400 degree oven for 45 minutes.  While they were cooking I started the chili.  In a good sized pot, I started cooking the bacon slices.  I then started dicing all my veggies.  By the time I was done the bacon was browned and almost crispy.  I added the veggies in and let them cook for a few minutes.  I then added the ground beef and spices.  I cooked the meat till it was cooked through then added all the tomatoes and tomato sauce.  Let that simmer together for a few minutes then serve over the yams.  


Verdict: YUM!  So easy and delicious.  Everyone liked this meal.  I got the recipe from PaleOMG and tweaked it. Not from necessity, but because I couldn't find fire roasted tomatoes and didn't defrost my green peppers in time to get them in.  I substituted some sun dried tomatoes that I rehydrated and a can of diced tomatoes with green chilies and just omitted the green pepper.  Easy enough to do and it tasted just fine to us.

PALEO BACON CHILI
Serves 4-6

INGREDIENTS:
2-3 yams, cut in half
6 slices of bacon, cubed
1 small yellow onion, diced
1 red pepper, diced
1 clove garlic, minced
1 pound ground beef
1 TBSP garlic powder
1 TBSP chili powder
2 TBSP paprika
2 tsp cumin
Salt and pepper to taste
1 (8 oz) can tomato sauce
1 (10 oz) can diced tomatoes with green chilies
4 oz sun dried tomatoes

INSTRUCTIONS:
1. Split the yams in half, poke with a fork, and start baking them in a 400 degree oven for about 45 minutes or until they are tender.
2. Take the sun dried tomatoes and cut them up. Place in 4 oz of water to start to reconstitute them.
3. In a good sized pot, start cooking your cubed bacon. 
4. While bacon is cooking, chop all your veggies.
5. When the bacon has browned and is a bit crispy, add the veggies (onion, pepper, garlic) to the pot.
6. Let that cook for a few minutes then add the ground beef and all the spices.
7. When the beef is browned, add the tomato sauce, diced tomatoes, and sun dried tomatoes.
8. Mix everything up and cook for a while to let the flavors blend.  Cook on low for about 8-10 minutes, stirring occasionally.
9. Place the yam in a bowl, pour some chili on top, and eat it.  Yum!

Wednesday, October 23, 2013

Slow Cooker Paleo Pork Stew


Last night's dinner might have flopped, but this one sure didn't!  I started this recipe based off of Nom Nom Paleo's similar recipe and I tweaked it a bit.  I made some good choices in this!  Quick, easy, and so, so good! 


I started off by slicing one onion nice and thin and adding a small bag of baby carrots to my 6 quart crock pot.  I minced 6 cloves of garlic and threw that on top.  Have I told you all that I FINALLY got a Pampered Chef garlic press?  Oh my gosh I am in love with it!  That thing is awesome.  If you use garlic frequently, you need one of those.  

Anyways...  I cubed 3 pounds of pork shoulder roast and threw that in a bowl and dumped on 1 tablespoon of my organic seasoned salt.  I mixed that all up and threw it on top of the onions and carrots.  I then cut a head of cabbage into about 6 wedges and placed them on top of the pork.  Some Marinara sauce, salt and pepper, then I cooked it on high for 5 hours.  When it was done, I poured some Balsamic vinegar all over the top then mixed it all up.   


Verdict: This was a great meal tonight.  It was a cold day and this warmed us right up.  Very tasty and filling. Everyone loved this meal and it will be made again.

SLOW COOKER PALEO PORK STEW
Serves 4-6

INGREDIENTS:
1 small onion, sliced thin
6 cloves of garlic, minced
½ pound baby carrots
Sea salt
Freshly ground black pepper
3 pounds pork shoulder roast, cut into cubes
1 TBSP organic seasoned salt (or your favorite seasoning blend)
1 small cabbage, cut into 6-8 wedges
1 cup Paleo-friendly marinara sauce
1 TBSP Balsamic vinegar

INSTRUCTIONS:
1. In bottom of 6 quart crock pot (or large crock), lay down the sliced onions, carrots and minced garlic.  Season with salt and pepper.
2. In a bowl place your cubes of pork roast and coat with the 1 TBSP of organic seasoned salt.  Mix well.
3. Put the seasoned pork cubes on top of the vegetables in the crock.
4. Cut the cabbage into 6-8 wedges and lay on top of the pork cubes. 
5. Drizzle with marinara sauce.  Season with more sea salt and freshly ground pepper.
6. Cover and cook on high for 4-6 hours.
7. Take the lid off and drizzle with 1 TBSP Balsamic vinegar.  Mix all ingredients well.  Serve and enjoy.

Tuesday, October 22, 2013

Crock Pot Applesauce


Are you scared of making your own applesauce?  I sure was.  Emphasis on the "was" part.  I found a recipe that was super easy and tastes good, too.  Because, you know I'm all about the easy recipes.

Ready for this... this recipe needs apples, water, and canning jars.  Woo hoo!  I peeled and cut enough apples to fill my 6 quart crock pot and added 1 cup of water.  I turned it on high and let it cook for a few hours until the apples were nice and soft.  I then threw the apples into my food processor and pulsed them until they were the consistency I wanted.  Actually, they could have been just mashed with a potato masher if I wanted them a little chunky.

I poured them immediately into 6 sterilized mason jars and sealed them.  You can see in my picture up there that I left a lot of room.  I probably could have put more applesauce in each one and I would have only gotten 5 pints of applesauce out of the 6 quart crock pot.  I immediately turned the jars upside down and let the heat from the hot applesauce seal the jars.  It only took a few minutes and the jars did seal themselves without a hot water bath.

Verdict: This applesauce is totally sugar free, preservatives and additives free, and completely paleo friendly.  I can't wait to serve this with dinner tomorrow night.  I tasted a little that I didn't jar and it was delicious, even sugar free.

**UPDATE: Once this cooled all 6 jars had sealed themselves just fine.  We opened the 1/2 pint jar to eat first and it is super tasty!  Everyone liked it, even without sugar added.

EASY CROCK POT APPLESAUCE
Makes 5 pints

INGREDIENTS:
Enough peeled and cut apples to fill a 6 quart crock pot
1 cup water

INSTRUCTIONS:
1. Place all apple slices in crock pot. 
2. Add 1 cup of water.
3. Cook on high until apples are tender and mushy.
4. Mash with potato masher or pulse in food processor until applesauce is desired consistency.
5. Pour into sanitized pint sized mason jars.
6. Immediately seal and turn upside down while hot.
7. Keep upside down until jars have completely cooled.  Jars will seal themselves by the heat of the applesauce.  If any jars don’t seal, use those first.  All of mine sealed just fine.

Monday, October 21, 2013

Chicken and White Wine Sausages with Bacon Brussel Sprouts


My hubby has spent quite a few days over the last two weeks bow hunting for deer.  It's now bow and black powder season and almost rifle season, so today we went up to Bass Pro Shops to buy some new hunting clothes for me. The clothes I wore 2 years ago don't fit anymore - in a good way, they're way too big.  

We were a bit disappointed in the lack of options for ladies.  In fact, while I was able to get a ladies shirt, I ended up with a youth sized bib style pair of pants because all the ladies pants options (that were available in my size) were too light-weight or well over $150 a pair.  Thankfully, we found the youth pants that fit and there was one shirt that fit me that was the right thickness to wear in the cold weather.  So I'm all set to hunt.  I looked pretty good, too!

After we were done shopping for me, we went over to the guns and checked out all the black powder accessories. My husband has his father's black powder gun and he's never shot it.  He thinks it's been about 20 years since it's been fired so it is in need of a good cleaning before it can even be shot.  It took a while to figure out what to buy for cleaning the gun and firing it.  Then of course since we were near the guns, we decided to check out the rifles since we have a new hunter in the house.  Our son has a .22 that was gifted to him from my step-dad, but he and my hubby need to refinish the wood on it.  A .22 isn't great for hunting deer so we are considering options for a birthday present.  But that depends on a lot of other things down the road.  Definitely won't happen before hunting season this year.  

Why am I telling you all of this?  Because by the time we got back from all our shopping (we even had a stop at JoAnn Fabrics to price fabric to reupholster our wing-backed chairs) it was way too late to cook the dinner I had planned.  So, I whipped up something new based on what I had on hand.


This week at the farmer's market I picked up a new flavor of sausages, Chicken and White Wine.  I also got some brussel sprouts and yams.  I've also been using my cast iron skillets more and more because I'm finding I just like my meals cooked in them better.  I don't know why, but I just do.  I broke out 2 large skillets because I could see that 1 wasn't going to be enough and started cooking 2 pieces of bacon in each to get the fat going.  I cut each brussel sprout in half and sliced my sausage links.


Once the fat started rendering, I took the bacon out then I added the sausages in one pan and the brussel sprouts in the other.  I cut the bacon into pieces and threw it all into the pan with the brussel sprouts.  I probably could have cut it down before I started cooking, but oh well.  At the same time, I had 2 sweet potatoes (cut in half lengthwise and turned face down in a glass pan) cooking for 10 minutes in my microwave.  Once it was done cooking, I moved the pan to my broiler on high and cooked for 5 minutes face down and another 3 face up.


Verdict:  This was easy and tasty.  The brussel sprouts had a great flavor from the bacon and the sausages tasted wonderful.  The yams came out nice and tender which is what we all love.  The meal took a total of 20-25 minutes with prep time so it was nice and simple for us tonight.

CHICKEN AND WHITE WINE SAUSAGES WITH BACON BRUSSEL SPROUTS
Serves 4

INGREDIENTS:
4 chicken and white wine sausage links, sliced in pieces
2 pints brussel sprouts, each sprout cut in half
4 pieces bacon

INSTRUCTIONS:
1. Preheat 2 cast iron skillets to just over medium.
2. Add 2 pieces of bacon to each skillet. 
3. When the fat begins to render, remove the bacon to cutting board and in one pan add the brussel sprouts and in the other add the sausage pieces.  Turn sprouts in pan to coat in bacon fat.
4. Cut the bacon into pieces then add all the bacon back to the brussel sprout pan.
5. Cook until the bacon and sausage is cooked through, turning sprouts frequently so they do not burn

Thursday, October 17, 2013

Paleo Turkey Sliders with Avocado Slaw


I came across this recipe over at PaleOMG last week and decided to play with it.  We're not really "Southwest" and "spicy" kind of people when it comes to our food, so I tweaked the recipe a bit.  It was kind of nice to play with a recipe not because I had to but because I wanted to.


For this meal I used a pound of ground turkey, 1/2 of a red onion, some cumin, salt, pepper, and bacon fat.  That was just for the sliders.  I sliced half of that red onion and minced the other half.  I mixed them all together and shaped them into sliders.  This made 13 sliders.


For the avocado slaw I shredded 1 head of cabbage to start.  Well, I didn't shred it, I had my hubby shred it while I was shaping the sliders.  When he was done I used the food processor to blend together 2 avocados, salt, cumin, olive oil, lemon juice, and lime juice.  After that was nice and smooth, I poured it over my shredded cabbage and mixed it all together and used that as a bed for my sliders.


Verdict: This meal was liked by all.  I served it with some baked yams (not sweet potatoes) which are Paleo in moderation.  #2 decided that he loved the yams and ate all of his, which is amazing because I've never gotten him to eat a sweet potato before.  For the avocado slaw I omitted the red pepper and I wish I had left it in to give it a bit more of a kick.  Next time I'll use it.  Oh yes, there will be a next time.

PALEO TURKEY SLIDERS
Serves 4

INGREDIENTS:
1 lb ground turkey
¼ red onion, thinly sliced
¼ red onion, minced
1 tsp ground cumin
Salt and pepper to taste
1 TBSP fat (I used bacon fat)
Additional fat for the cooking pan

INSTRUCTIONS:
1. Add all your ingredients for your burgers in a large bowl. (Minus fat for the cooking pan.)
2. Shape small burger patties.
3. Heat up a large skillet under medium heat with a bit of fat in it (I used more bacon fat) and add your sliders.  Flip after 3-5 minutes or when you see the sides of your sliders begin to turn a white color (meaning they are cooking through.)
4. Serve on top of Avocado Slaw.  Yum!
PALEO AVOCADO SLAW
Serves 4

INGREDIENTS:
1 small head of cabbage or bag of cabbage, chopped
2 avocados
1 TBSP olive oil
1 tsp lime juice
½ tsp lemon juice
1 tsp ground cumin
½ tsp crushed red pepper
Salt and pepper to taste

INSTRUCTIONS:
1. Shred your cabbage in a food processor or however you want.
2. Clean out your food processor and insert the S blade and add all the ingredients except for the cabbage and pulse until smooth.
3. Pour your avocado “mayo” on the cabbage and mix.
4. Put the cabbage on a plate and top with the Turkey Sliders.

Wednesday, October 16, 2013

Paleo Moo Shu Beef with Cauliflower Rice


Look at that, Chinese food that is Paleo?  Yes, that's right!  I've never had Moo Shu beef before but this tasted pretty darn good.  It also looked pretty close to some of the internet pics I've seen, so I'm happy there.  

It's Wednesday, so that means I used my crock pot.  This recipe took a little prep work, but it was fun prep work. This was the first time that I used the shredder blade on my food processor, so that was fun to work with.  For the most part though, this meal was pretty simple.

I chose the 4-quart size on my crock pot and put my beef roast in.  I used a 3ish pound roast and we will have some leftover Moo Shu for lunch tomorrow.  I shredded some cabbage and threw it all on top of the roast.  After that I added some minced fresh ginger and minced garlic.  I mixed up some Hoisin sauce with some apple cider vinegar and poured it all over the Moo Shu.  Cook it on high for a few hours and when there was 1 hour left I had my hubby add some mushrooms and sliced green onions.  I would have done it but I was still at ballet with #3.


When I got home I prepared the cauliflower rice.  I broke out the shredder attachment on my food processor again and went to town.  The shredder cut down the cauliflower into little pieces that look like rice.  It didn't exactly taste like rice, but it looked like rice and gave me the impression that I was eating it.  Just look at that picture up there, it really looks like rice.


Verdict: This was one tasty meal.  For a family that likes our Chinese food, I'm glad we were able to incorporate a meal back in.  Was it authentic?  Well, the Moo Shu certainly had the flavor of a good Chinese dish, the rice, not so much.  But it was a good way to prepare the cauliflower and it alone tasted good.  Hubby, kids and I all loved the meal and it will be a repeat.   

CROCK POT MOO SHU BEEF
Serves 4-6

INGREDIENTS:
3ish lb beef chuck roast
Sea salt to taste
Fresh ground black pepper to taste
½ head cabbage, red or green, cored and sliced thin or shredded
2 TBSP fresh ginger root, finely chopped
3 garlic cloves, minced
1 cup Paleo Hoisin sauce (or cheat like I did for one night and use regular Hoisin sauce, all the Paleo versions have coconut aminos)
¼ cup apple cider vinegar
8 ounces shitake mushrooms, sliced
4 green onions, white and green parts thinly sliced
½ tsp sesame seeds, optional

INSTRUCTIONS:
1. Season roast with salt and pepper and place in the bottom of your crock pot.
2. Sprinkle cabbage over the top, then evenly distribute ginger and garlic.
3. Drizzle Hoisin sauce and vinegar over the top.
4. Cook on high for 5-6 hours.
5. One hour before meat is done, add mushrooms and half of the green onions.
6. To serve, transfer roast from the crock pot to a cutting board.  Cut into bite-sized pieces.  Add meat back to crock and stir together crock pot contents.
7. Divide evenly among bowls.  Drizzle with additional green onions and sesame seeds, if desired. 

CAULIFLOWER RICE
Serves 4-6

INGREDIENTS:
1 head cauliflower

INSTRUCTIONS:
1. Process fresh cauliflower in food processor until it is the size of rice, using the plain steel blade or the shredder blade.  You can shred it with a hand held grater or even a knife if you have the dexterity and patience to chop it very finely.
2. Place it in a microwavable safe dish with a lid.  DO NOT ADD WATER.  Cauliflower absorbs water and will become gummy if you add water.
3. Microwave it for 2-5 minutes or until it’s as hot as you’d like.

Monday, October 14, 2013

Paleo Banana Ice Cream


Want to know the simplest ice cream recipe?  How's one ingredient sound?  

Banana ice cream made in my food processor.  So simple and so good.  No sugar, no milk, just one ingredient, frozen bananas.  I decided to try this recipe out because we bought a bunch of bananas on Saturday at the farmer's market and the nice gal put the bunch of bananas on the top of our reusable shopping bag, which was full of cold meat.  I didn't realize it until more than an hour later and by the time we got home and looked at the bananas, they had gone through a super speedy ripening process.  NEVER bag your bananas with cold stuff.  So I immediately threw them in the freezer to try to salvage them, knowing I had seen this recipe last week.  

Well, I didn't exactly read the recipe last week, just saw that it only took frozen bananas and made them into ice cream.  What I didn't read was the recommendation to peel your bananas and chop into chunks before you freeze them.  Why you ask?  Because if you take them out frozen, you can't peel a frozen banana.  

This is where my hubby comes to the rescue, as he often does!  He really wanted to try this ice cream tonight since I had mentioned it at dinner, so he comes out with a knife and gets to chopping.  He cut the bananas up into chunks and I took another knife and cut the peels off.  He's so good!

I took all the chunks and threw them into my food processor.  This is the third time today I've used it.  I think I'm getting some good use out of this birthday present!  I started to puree the bananas, stopping a few times to scrape it down.  Honestly, for a while there I thought I had screwed something up because nothing was happening.  I kept scraping and kept pureeing.  Scrape and puree.  


Then out of nowhere, BAM!  I had ice cream.  It just took one more scrape and puree to get the bananas down and we had all the ice cream.  It was delicious!  This was an amazingly simple treat. 


Verdict: Aww yeah!  Look at that!  I added some of my homemade granola on top and had myself a little sundae!  I could have added some Dark Chocolate chunks to the mix, cocoa powder, or even strawberries.  There are lots of ideas I could come up with and still keep this Paleo.  Seriously, try this out.

PALEO BANANA ICE CREAM
Serves 2

INGREDIENTS:
1 ½ -2 bananas

INSTRUCTIONS:
1. Peel banana.
2. Slice into 4ish pieces each.
3. Place on a plate and freeze for 1-2 hours.
4. Place chunks into food processor.
5. Puree for a good while, stopping to scrape down the sides periodically.
6. Be amazed as it suddenly turns into ice cream!
7. Here you would add any toppings of choice to blend into the ice cream.
8. Enjoy!

Paleo Granola


I have missed having cereal.  My kids really miss having cereal for breakfast.  I don't just miss cereal, I miss having something to munch on every now and then.  I've got fruit I can grab, which is great, but I want something crunchy to munch on.  I think I found the recipe.

This homemade granola was super easy to make.  Almonds, cashews, pumpkin seeds, sunflower seeds, raisins, honey, vanilla, and almond oil.  The original recipe from Paleo Cupboard called for coconut oil and coconut flakes, but of course, I adapted.

Unfortunately, I adapted poorly this first time.  I added the same amount of almond oil rather than reducing the amount due to the lack of coconut flakes and the difference in consistency between the almond oil and coconut oil. Don't get me wrong, this recipe wasn't bad.  Just the opposite, it was super delicious!  It was just rather sticky and didn't make for hard granola pieces that we could eat.  It was a sticky mess, but such a good tasting sticky mess!


When it was done cooling off it took no time at all for me to grab a bowl and have some cereal.  Who cared that it was 9:30 at night, I was eating some cereal!  My hubby had a spoonful of the dry granola and his face literally lit up and he said it was really, really good!  I ate my bowl of granola with some almond milk and it was amazing.


Verdict: This was super easy and super delicious!  The granola was gone before I could even finish typing this blog post.  I'm going to make another batch this afternoon but I'll cut the honey and almond oil down in hopes that it won't be as sticky.  Either way, this is a tasty snack/breakfast/treat!

**UPDATE
I made this again and used 3 TBSP almond oil and 1/3 cup honey.  While it wasn't as sweet as the first time I made it, it held together perfectly, just as granola should.  Next time I'll play with it again, possibly adding the honey back in and lowering the almond oil down in order to keep the sweet flavor.

PALEO GRANOLA
Serves 6

INGREDIENTS:
1 cup raw almonds
1 cup raw cashews
¼ cup raw pepitas/pumpkin seeds
¼ cup raw sunflower seeds (no shells)
¼ cup almond oil **I WILL BE USING LESS NEXT TIME, LOOK FOR MY UPDATE**
½ cup raw honey **I WILL BE USING LESS NEXT TIME, LOOK FOR MY UPDATE**
1 tsp gluten free vanilla extract
1 tsp sea salt
1 cup raisins (or your favorite dried fruit)

INSTRUCTIONS:
1. Preheat oven to 275 degrees.  Place the almonds and cashews in a food processor or blender and pulse a few times to break into smaller chunks. 
2. Microwave the almond oil, raw honey, and vanilla extract together in a medium sized mixing bowl for about 30 seconds.  Add the seeds and nuts and stir to coat.
3. Spread the granola mixture evenly on a baking sheet lined with parchment paper and cook for about 20-25 minutes or until lightly browned.  Stir it once or twice. 
4. Remove from heat and add the raisins and sprinkle with sea salt, pressing the mixture together to form a flat surface.
5. Allow to cool for about 20 minutes or until hardened, and then break into chunks.